Gather
corn husks
old newspaper
twine or string
cotton balls
paint, yarn and glue (optional)
Go
1. Lay the husks on newspaper to dry for several days.
2. Soak the dried husks in water until they are just soft enough to bend.
3. Take three unblemished husks and line up the blunt ends to make them even. Tie them together with twine about ½ inch down from the blunt ends.
4. To make the head, peel the husks back over the end with the knotted twine. Fold them down so they cover the knotted ends.
5. Insert a cotton ball to pad the doll’s head. Arrange the husk to make a smooth face, then tie another piece of twine to make the neck.
6. To make the arms, roll a single husk into a long, narrow tube and tie it off at both ends to make wrists. Slip the arms between the husks below the head.
7. Stuff a cotton ball or two into the husks below the neck, then tie twine around the doll’s waist.
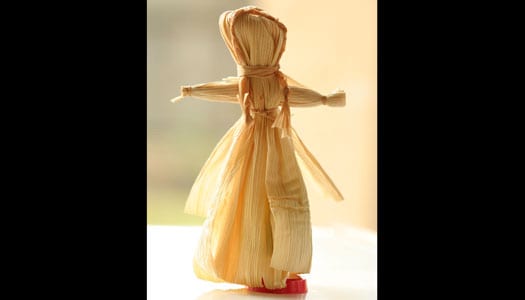
8. To make a skirt, tie several husks around the waist so the longer portions are covering the doll’s face. Then carefully fold them down. Trim the ends straight across.
9. Traditional corn husk dolls don’t have faces, but if you want, you can decorate your doll with paint or markers. You can also glue on yarn for hair.