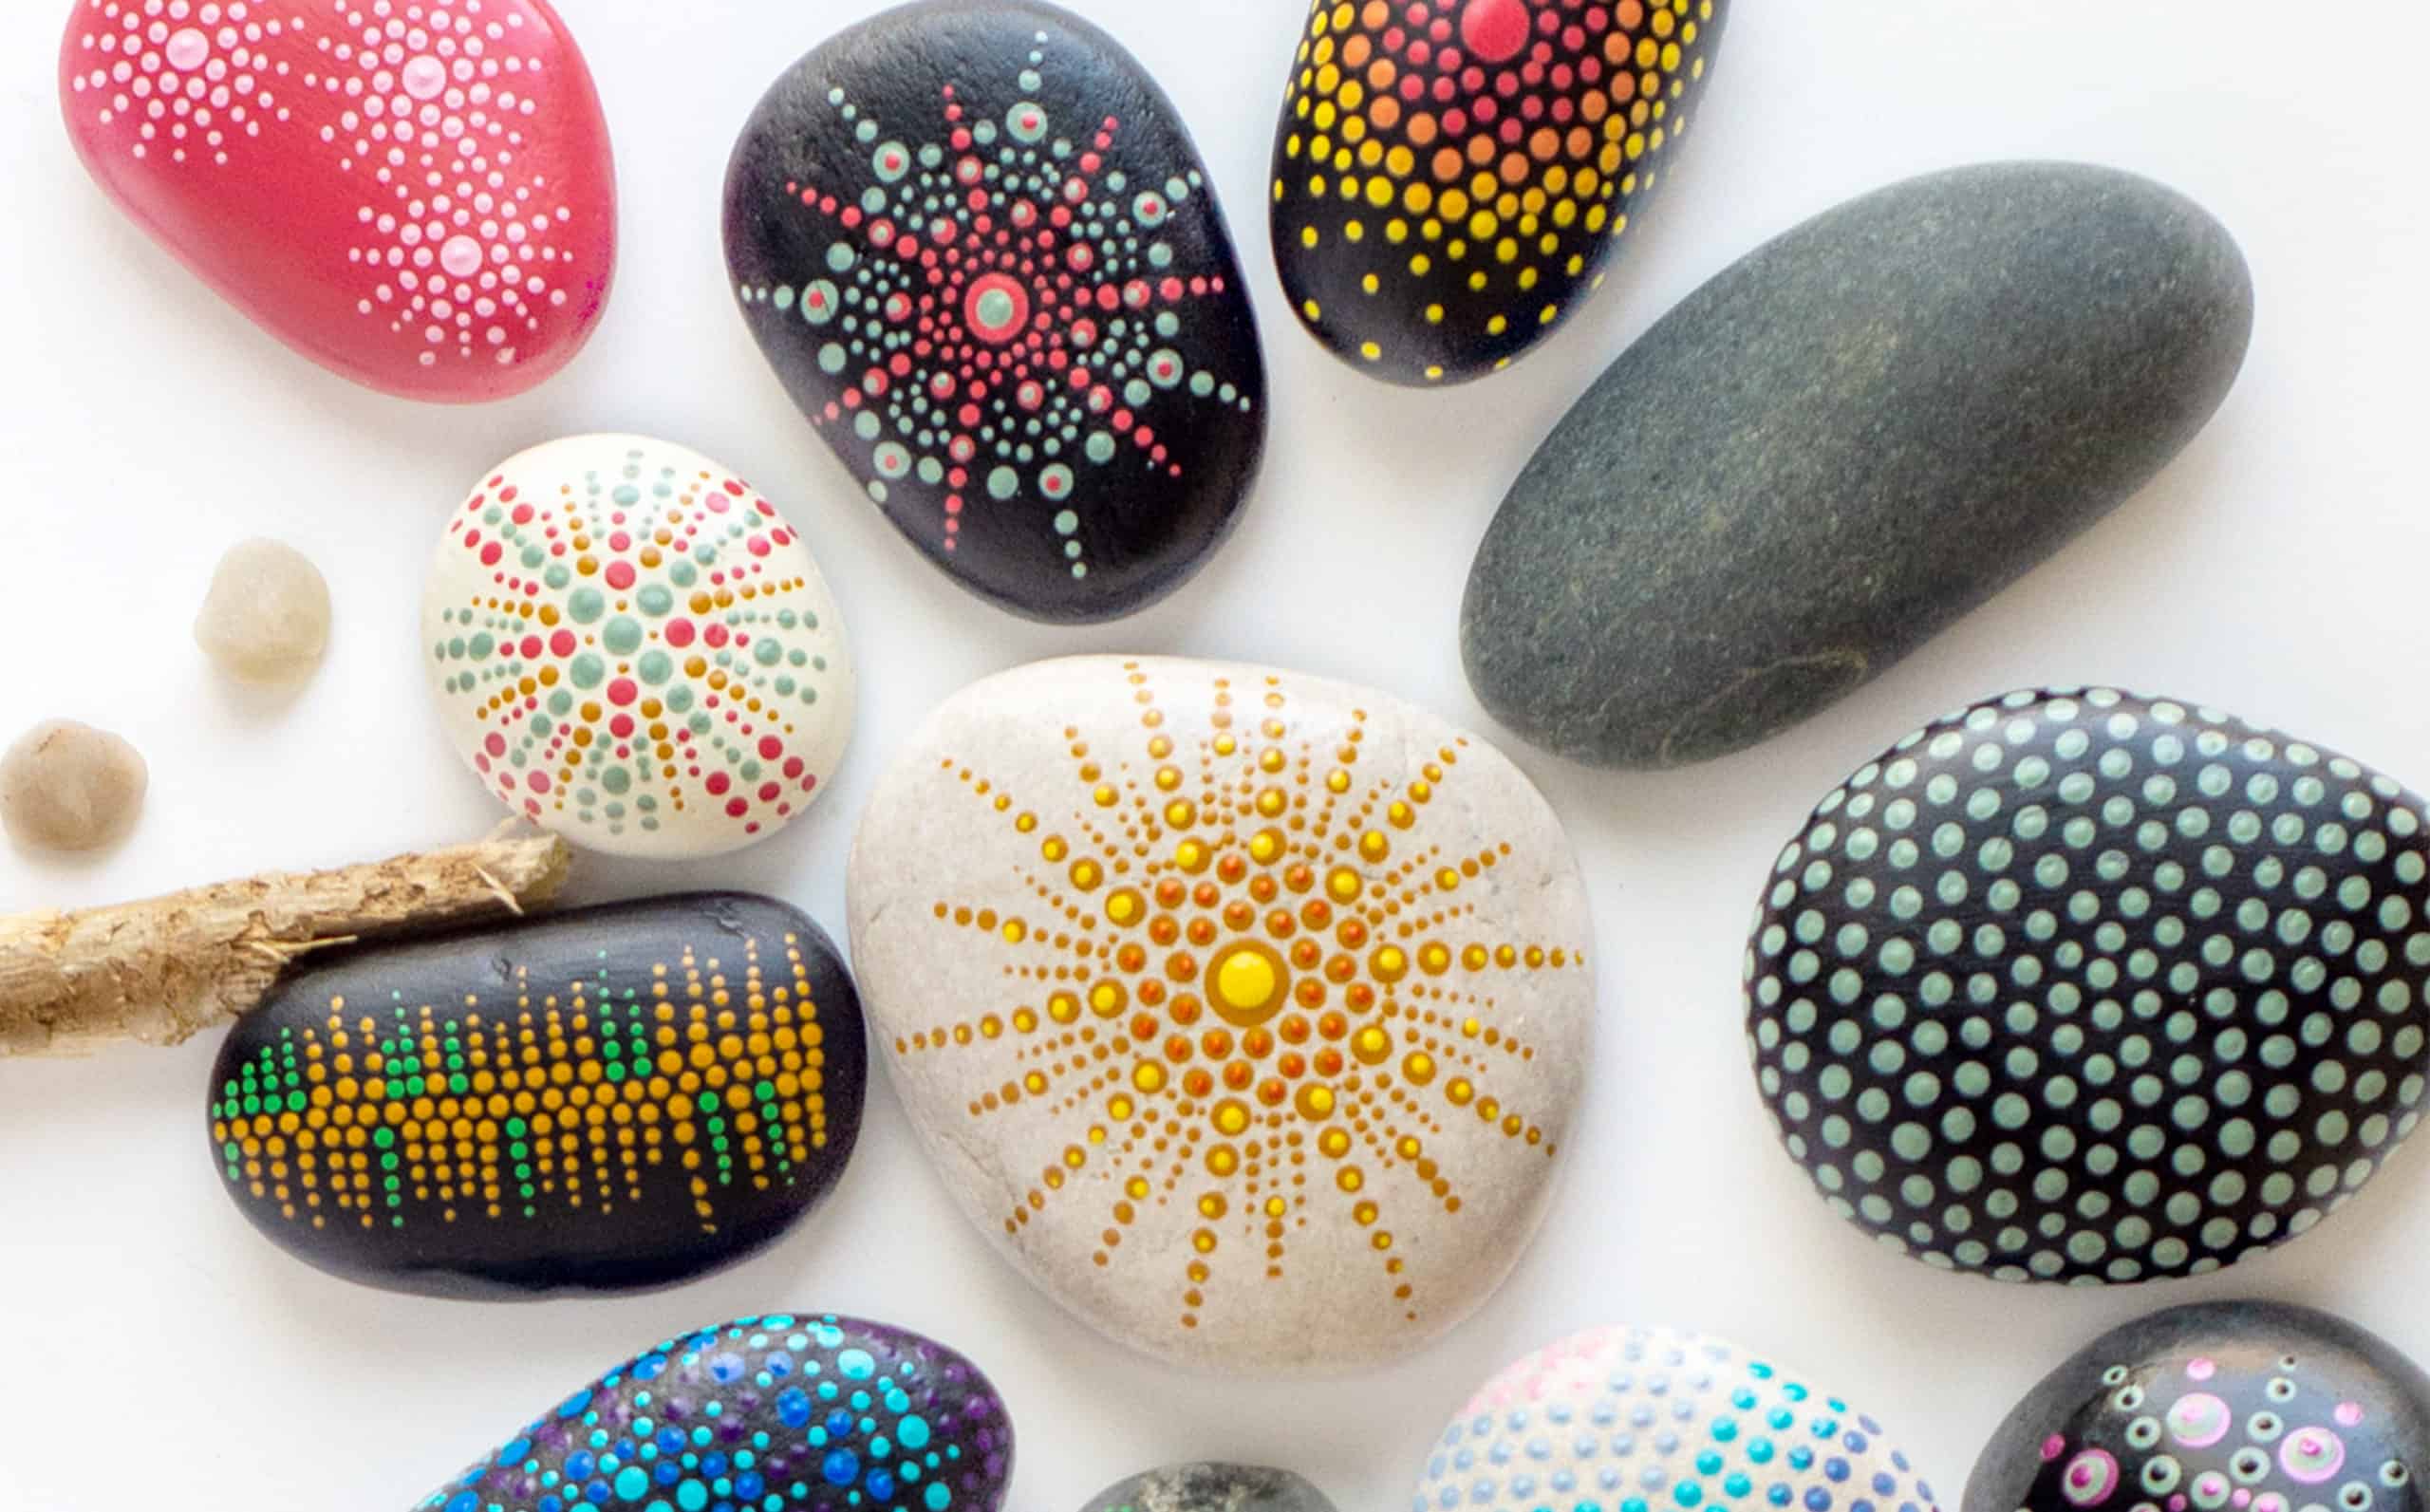
Try painting on a different canvas—rocks! Gather your friends, find a few smooth stones, set up your workspace and create. (My favorite place to paint is outside on a picnic table.) These painted rocks can make great gifts. Or you can leave them for others to find in trails, parks or gardens.
What you need
- Smooth stones (Shape and size aren’t as important as texture. The smoother the better.)
- Scrub sponge or bristly brush
- Flattened cardboard box, plastic tablecloth or newspaper
- Assortment of acrylic craft paints
- Plastic palette, paper plate or small painting cups
- Disposable container filled with water
- Dotting pen tools (in different sizes) and brushes
- Spray-on sealer
- Paper towels and cotton swabs
Prepare the rocks
- After choosing your rocks, wash off the dust and dirt using warm running water. A scrub sponge or bristly brush can remove stubborn bits of dirt.
- Air dry the wet rocks by placing them on a paper towel on the counter, turning over once to make sure they’re completely dry on both sides.
Brainstorm your design
While your rocks dry, think about how you’ll paint them:
- Will you be painting dots directly onto the rock? (I like to do this if the rock is uniform in color with no blemishes.) Or will you apply a base coat with either one or multiple colors?
- What will your color palette be? Choosing colors before you start dotting keeps your workspace organized.
Paint and create
Once you’ve chosen your rocks and colors, it’s time to start painting.
- Protect your surface by placing a flattened cardboard box, plastic tablecloth or newspaper over your work area. Give yourself plenty of room.
- Squeeze small dabs of paint onto a plastic palette, paper plate or small painting cups.
- If desired, use a flat brush to cover one side of the rock completely with a thick coat of paint. Black is the most common choice; colors pop against a dark background. Set aside, and let dry thoroughly before painting the other side or starting your dots.
- Using your variety of dotting pen tools, apply dots. Let dry.
- Repeat step 4 as many times as desired by applying another row or layer of dots using different sized tools. Keep adding dots until you get to the edge of your rock. Consider applying “top dots.” This is the process of adding another layer of color by adding smaller dots (using a smaller tool) to the already painted and dried dots.
- Sign your name on the back—you’re an artist!
- When you’re all dotted out (completely done), let paint dry for 24 hours. Seal your works of art with a light coat of a spray-on sealer. These come in various finishes: matte, satin and gloss. I recommend using a gloss finish if you’re a beginner. Paint-on sealers are also an option but are thicker and more time-consuming.
Painting multiple rocks
If you plan to paint a few rocks, do them simultaneously. The most common frustration is accidentally smearing the dots that haven’t completely dried. To avoid this, work on your rocks in stages. Place each rock with its paints on separate paper plates. After you finish a layer of dots on one rock, slide the paper plate out of harm’s way while the paint dries. Move another paper plate in front of you and work on that rock. Continue rotating between rocks. >
If you make a mistake
No worries! If the paint is still wet, wipe off the mistake with a paper towel or wet cotton swab. Let the rock dry completely before resuming your dotting.
If the mistake dried, dab a bit of your base paint to cover the mistake.
If you made a righteous mess and want to start over, simply paint a new base coat on the entire rock and start again.